How to Set Up a Tag in Google Tag Manager?
After creating the account and embedding the code on each page on the website, we need to set up the tags. No limitations for the tags, but you need to do it right.
Using good practice in naming the tags will result in good reports; otherwise, you will not get the correct reports.
Let us start creating a new tag:
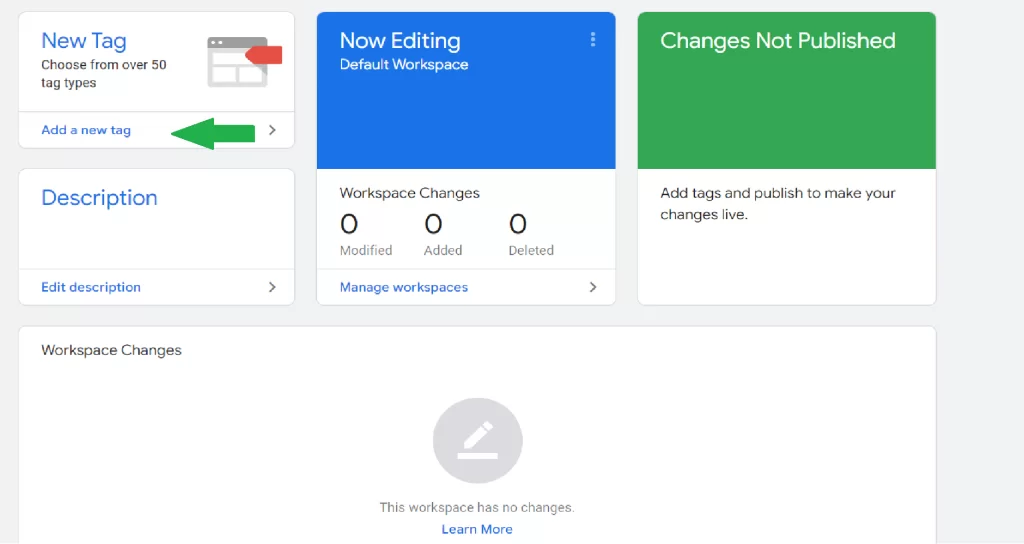
- Create a new tag in the Google Tag Manager dashboard. From the dashboard, go to your account, then add a new tag.

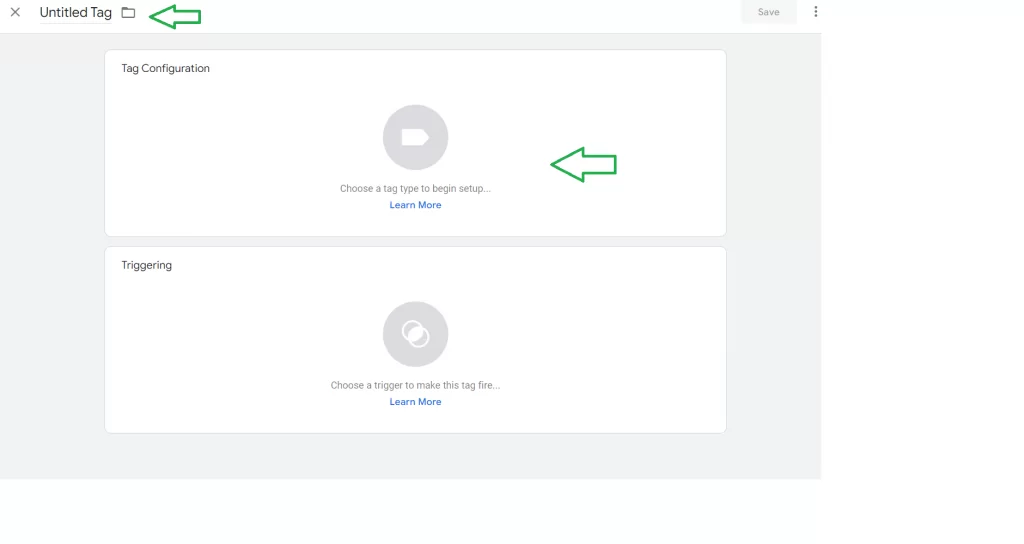
- Configure your tag. Give the tag name and tab on tag configuration, and be sure you are using a unique name that is entirely understandable along with the page name you will monitor.

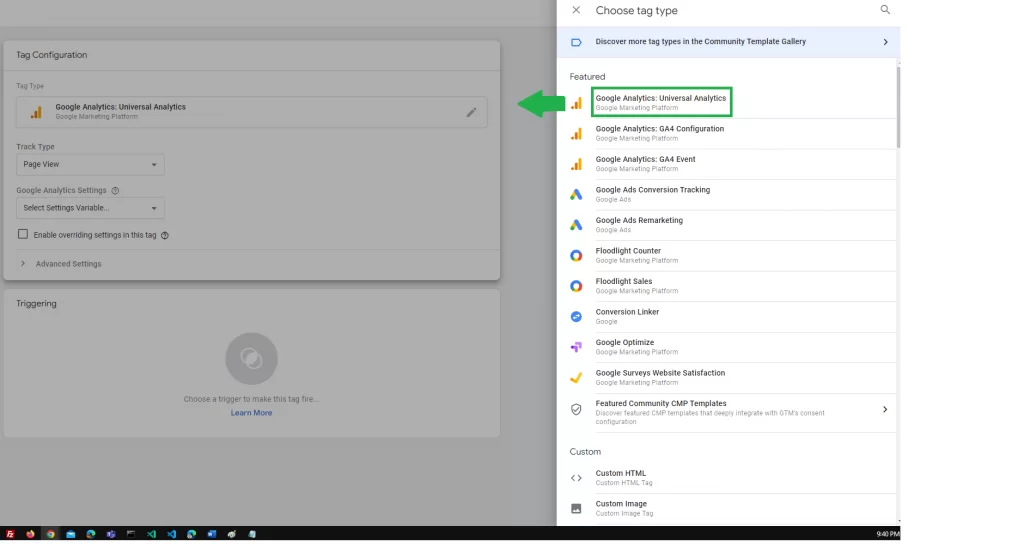
- Choose a tag type. We will do the google analytics GA4 Configuration

- Link your tag to Google Analytics tracking.
After selecting Google Universal Analytics, we need to choose the tracking type we have Page View, Event, Transaction, Social, Timing, Decorate Link, and Decorate Form. In our case, we will use Page View.
After that, we need to select the setting we choose to add a new variable
We need to add the tracking ID; do you know it? If not, go to admin in your dashboard, then select the account setting -> property -> Tracking Info -> Tracking Code your code will be available starting with UA-.
If you did not fund it, you could get it by going to the home -> All account -> select the Analytics account. You will find it in the next column under properties & Apps, starting with UA- - Save the variable with good practice naming method that you can use in the future.
- Choose a trigger to determine when the tag is recorded.
Click on the triggering section and select your trigger. - Save your tag.
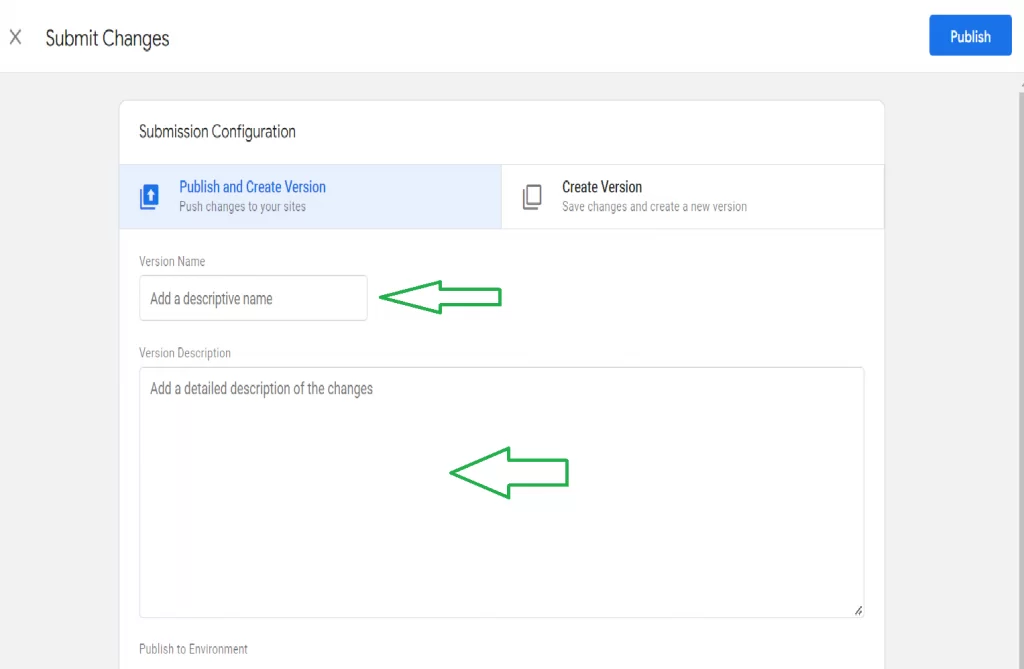
- Activate your tag by pressing “Submit.”
- To keep your work organized and understandable in the future, you can add a descriptive name and version descriptions

When everything is done, go to your dashboard to check if your tag is now the summary or not.
